
Difficulty
Moderate
Steps
8
Time Required
- Services - EmonCMS 8 steps

Featured Guide
This guide has been found to be exceptionally cool by the site's staff.
Quiz
0
Introduction
Outline what you are going to teach someone how to do.
-
-
Setup account at: EmonCMS, setup your own EMonCMS instance or setup an EmonPi from OpenEnergyMonitor
-
Enter Username, Email and Password to register for an Account.
-
-
-
Click on Inputs
-
Select New Device
-
In devices already exist click the gear icon on an existing device.
-
Enter Node (0 - 32).
-
This will be used later in the WiFi module.
-
Enter name and location.
-
Select Initialize the Initialize again.
-
Click the gear icon click new and copy the device key.
-
-
-
Click "Enable EmonCMS" in the services tab.
-
Set node (0 - 32) Matching the value chosen in the last step.
-
Login the the OpenEVSE WiFi portal and click on the Services tab.
-
Verify the server is set to: emoncms.org/emoncms or the address of your EmonPi/EmonCMS instance.
-
Select https:// for the server if available to enable secure mode.
-
Paste the Device Key from EmonCMS to write-apikey.
-
Click Save
-
-
-
Go back to OpenEVSE Energy Monitoring
-
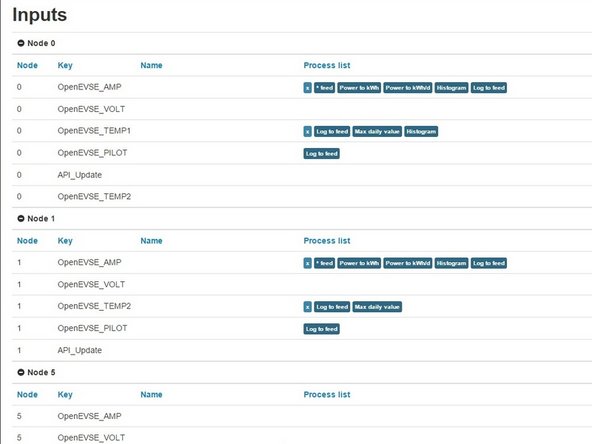
Select Inputs - Navigate to Setup => Inputs. The Inputs section should now display live data from OpenEVSE.
-
Inputs from other sensors can be included such as additional current, temperature, humidity, voltage etc. See Open Energy Project
-
Inputs displays live data from the sensors. This data is not stored, logged or archived.
-
-
-
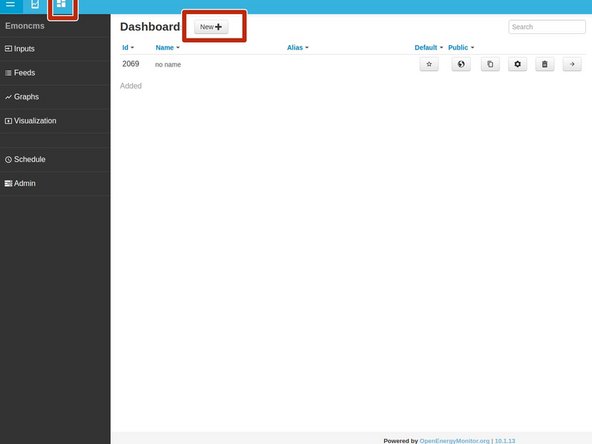
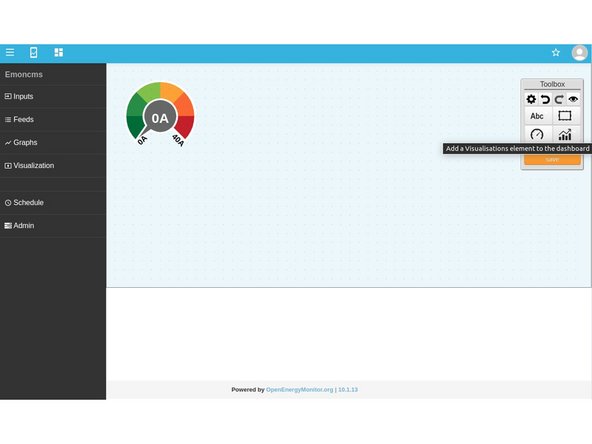
Dashboards display data logged from the feeds. You can create as many dashboard views as you wish.
-
Click on the Dashboard icon and click New + to create your first Dashboard.
-
The name can be edited by clicking on the pencil icon.
-
-
-
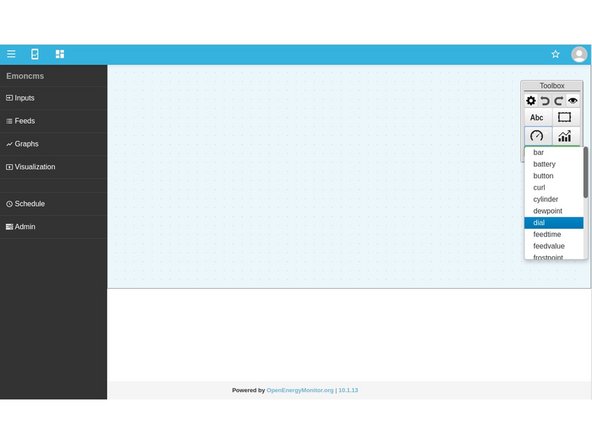
Select Widgets (Speedometer dial) then select dial.
-
Click on grid to place the dial. Move, re-size and adjust as desired.
-
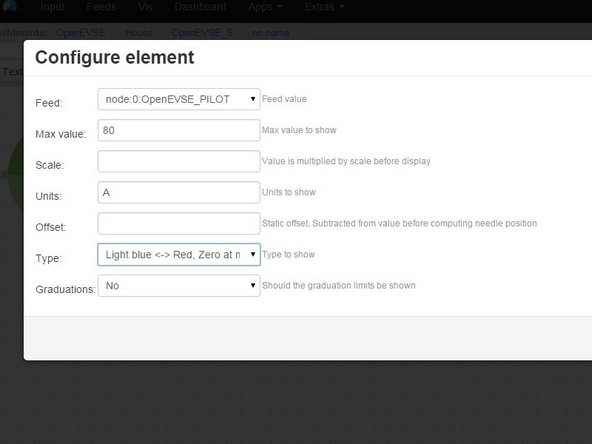
Click On the wrench icon to "Configure selected item"
-
Select Feed - Set Max Value - Set Units - Pick Type
-
-
-
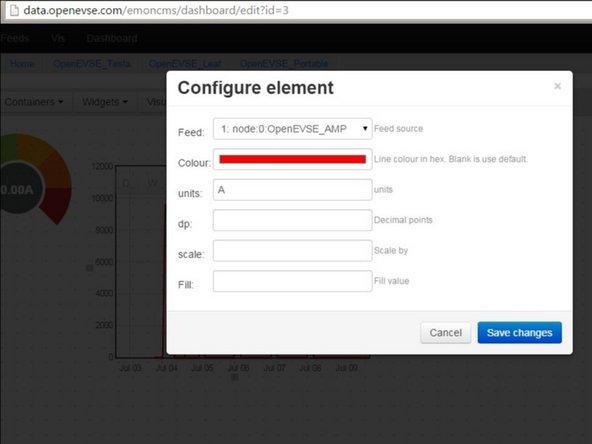
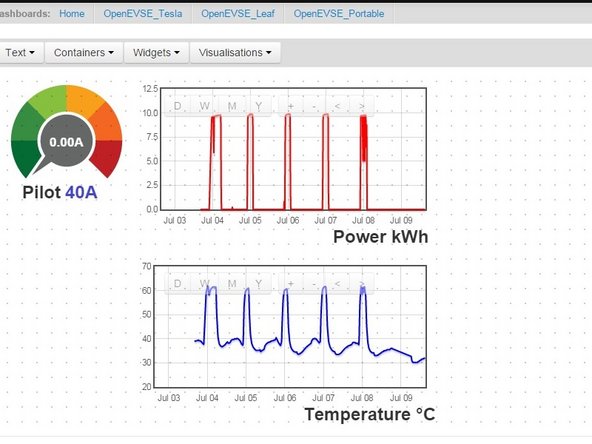
Add Rawdata charts for current and temprature. Click on Bargraph icon Visualizations then Rawdata. Click on the grid to add.
-
Click Wrench Icon to Configure selected item.
-
Select Feed, Color and Units
-
Move and scale as desired.
-
Save Changes
-
-
-
Add Text Labels
-
Feed values can be displayed. Click Widget > Feedvalue
-


Cancel: I did not complete this guide.
15 other people completed this guide.
5 Comments
Does the EVSE AP username and password need to be changed? Is the AP still accessable after I get the WiFi module connected to my home network? If the WiFi at my house goes down for some reason can someone connect to the openevse AP?
Tyler Hardy - Resolved on Release Reply
Step 2.2 has pins 4 and 5 reversed on the picture. I believe the description on the step on the right side is correct. The actual shipped connector has them in this sequence: BLACK, RED, GREEN, YELLOW. On your pic it's ...YELLOW, GREEN.
Alex Zonin - Resolved on Release Reply