-
-
This Guide explains the Firmware loading process for OpenEVSE.
-
This guide is specifically intended for the Windows Operating system. Advanced users may use a similar process for MacOS and LINUX.
-
-
-
Download Windows Driver for the OpenEVSE Programmer. Windows Driver. Extract files into a folder of your choice. Example C:\Drivers\AVRISP\
-
Windows 8 / 8.1 requires additional steps to disable "Driver Signature Enforcement" follow this Sparkfun Guide. '''Windows 7 and earlier may continue.
-
Plug in the OpenEVSE Programmer. Go into Device manager by right clicking on "My Computer" and selecting Manage or through the Control Panel
-
Locate the USBasp programmer. It is likely the unknown USB device. Right click and select "Update Driver Software"
-
Select "Browse my Computer for driver software". Click Browse and Select the location where you saved the extracted files.
-
-
-
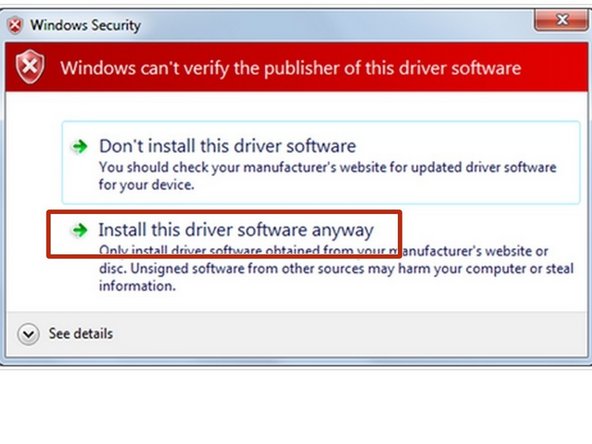
Depending on your Windows version and settings, you may receive a warning. Select "Install this driver software anyway".
-
The driver should now be installed and you should receive a window that says Windows has successfully updated the Device Driver.
-
No device drivers are needed for MacOS and LINUX.
-
-
-
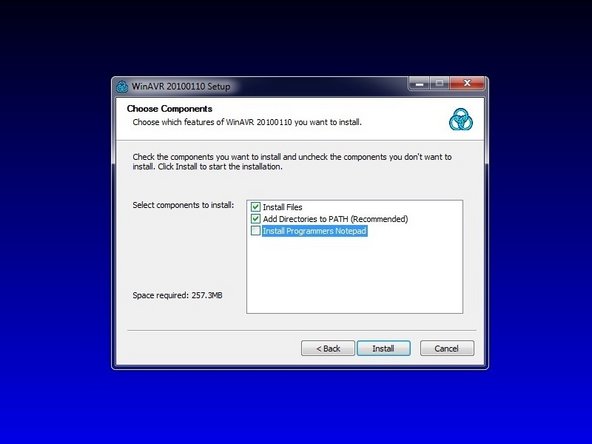
Download and install the WinAVR software. WinAVR
-
Select BOTH the Install Files and Add Path Options. Developers Notepad is Optional.
-
-
-
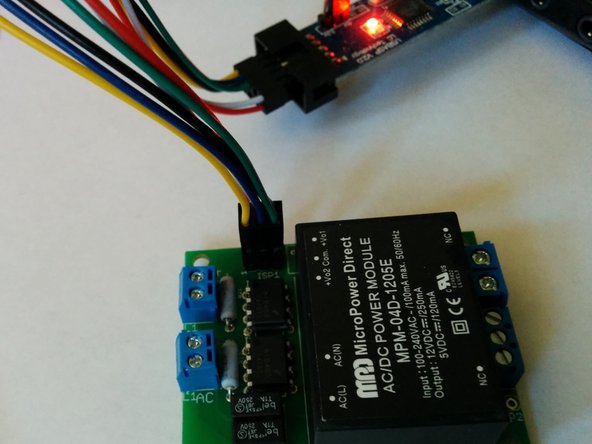
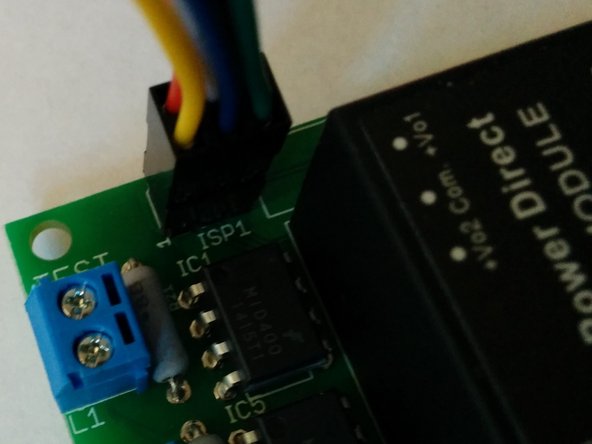
Connect Programmer to OpenEVSE then connect to USB port on PC.
-
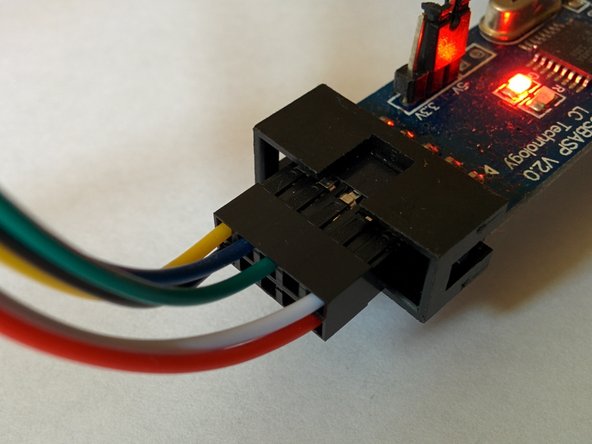
The yellow wire on the 6 pin connector aligns with pin 1 of the ISP connector.
-
-
-
Download a pre-compiled HEX file from the OpenEVSE store for your OpenEVSE product and your desired configuration.
-
Extract files into a local folder.
-
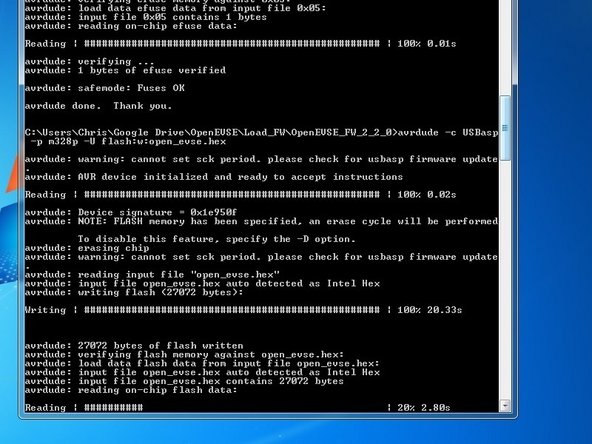
Run the OpenEVSE.bat file. Programming and verification should take about 60 seconds.
-
If the command window pops up and goes away immediately there is a problem with the Device driver and/or the WinAVR installation.
-
Warning can not set SCK period is normal and can be ignored.
-
-
-
Windoes 8/8.1 requires steps to prepair for the install. Windows 7 and below Skip to the next Step.
-
Move the cursor over the top or bottom right corner or the screen, extra options appear on the right side of the screen. Choose the Settings option (Gear). Choose 'Change PC Settings'
-
From the Left Menu choose 'Update and Recovery' in the left menu then 'Recovery' then click on the 'Restart Now' under the Advanced Startup option.
-
Select troubleshoot Then select 'Advanced options' and then 'Startup Settings' then 'Restart'.
-
After restart you will see a menu, choose 'Disable Driver Signature Enforcement' and hit the Enter key to start Windows.
-
Now you have successfully disabled the driver signature verification and you can install the driver.
-