Difficulty
Moderate
Steps
9
Time Required
- OpenEVSE WiFi (Beta) 9 steps

Featured Guide
This guide has been found to be exceptionally cool by the site's staff.

Private
This guide will not appear in search results and can only be viewed by team members!
Quiz
0
Introduction
Outline what you are going to teach someone how to do.
-
-
Setup Free account at: OpenEVSE Energy Monitoring
-
Enter Username, Email and Password to register for an Account.
-
-
-
Click on Inputs
-
Select New Device
-
In devices already exist click the gear icon on an existing device.
-
Enter Node (0 - 32).
-
This will be used later in the WiFi module.
-
Enter name and location.
-
Select Initialize the Initialize again.
-
Click the gear icon click new and copy the device key.
-
-
-
Login the the OpenEVSE WiFi portal and click on the Services tab.
-
Click "Enable EmonCMS" in the services tab.
-
Verify the server is set to: data.openevse.com/emoncms
-
Select https:// for the server if available to enable secure mode.
-
Set node (0 - 32) Matching the value chosen in the last step.
-
Paste the Device Key from EmonCMS to write-apikey.
-
Click Save
-
-
-
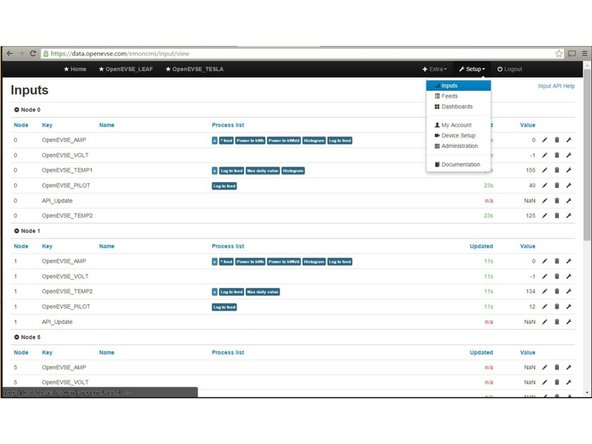
Go back to OpenEVSE Energy Monitoring
-
Select Inputs - Navigate to Setup => Inputs. The Inputs section should now display live data from OpenEVSE.
-
Inputs from other sensors can be included such as additional current, temperature, humidity, voltage etc. See Open Energy Project
-
Inputs displays live data from the sensors. This data is not stored, logged or archived.
-
-
-
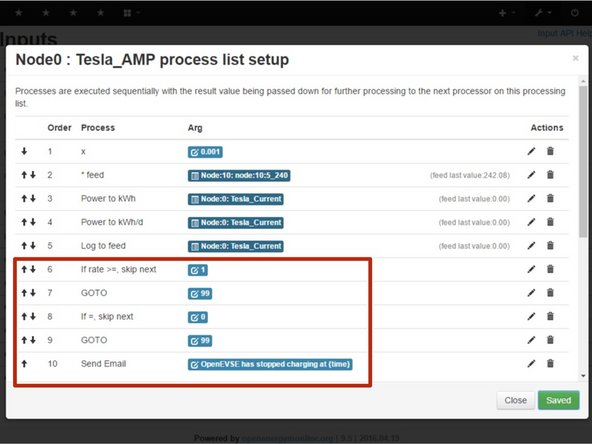
The OpenEVSE energy monitoring server supports powerful input processing and can send E-mails bases on flexible logic.
-
Example 1 - Send E-mail when Charging is complete. Add the values in the red box to the OpenEVSE_AMP input. Logic: If the value is changing and now equals 0 then send an Email. If not Goto the end "99".
-
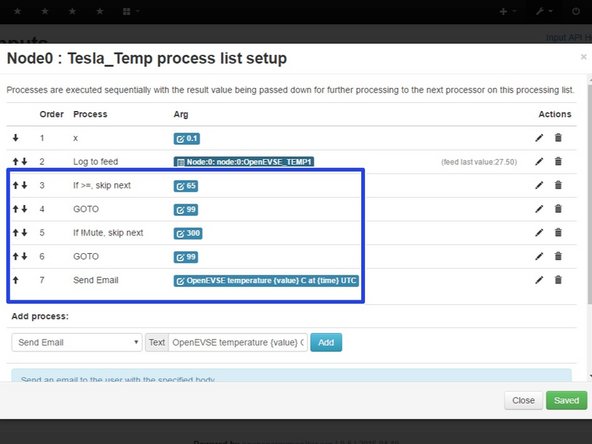
Example 2 - Send E-mail every 5 minutes when temperature exceeds 65C. Add the values in the Blue box to the active Temp input. Logic If temperature is greater than 65C and 300 seconds have passed (5 minutes) Send an Email with the current temperature.
-
-
-
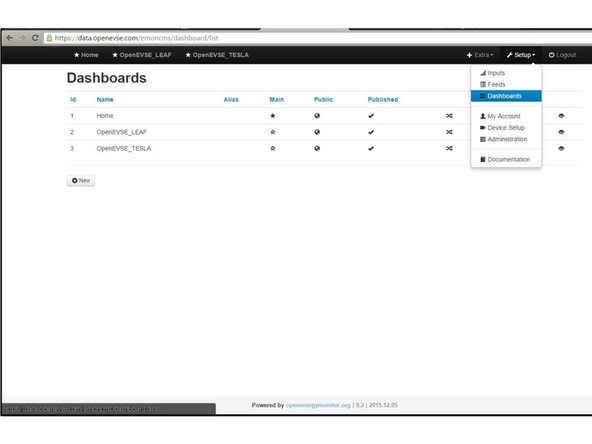
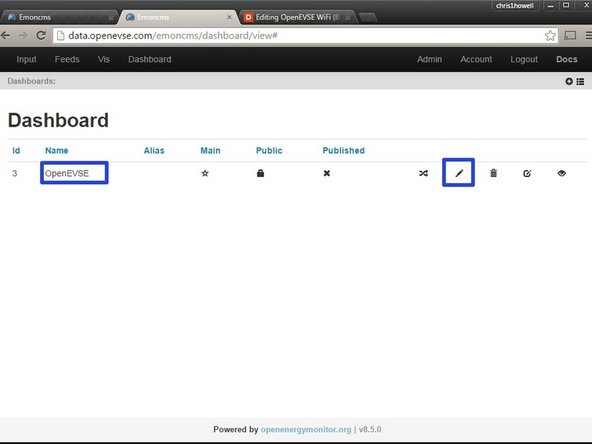
Dashboards display data logged from the feeds. You can create as many dashboard views as you wish.
-
Click on the + icon to create your first Dashboard.
-
The name can be edited by clicking on the pencil icon.
-
-
-
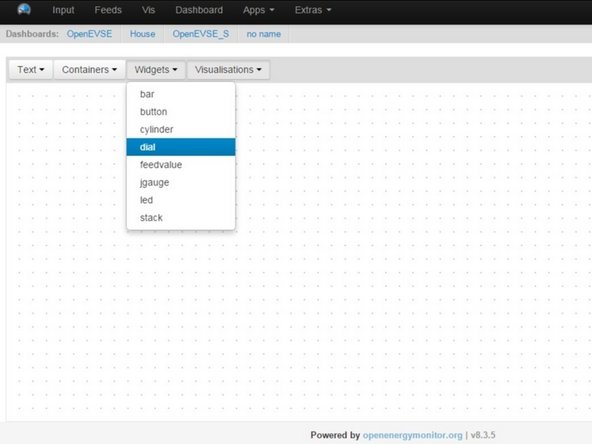
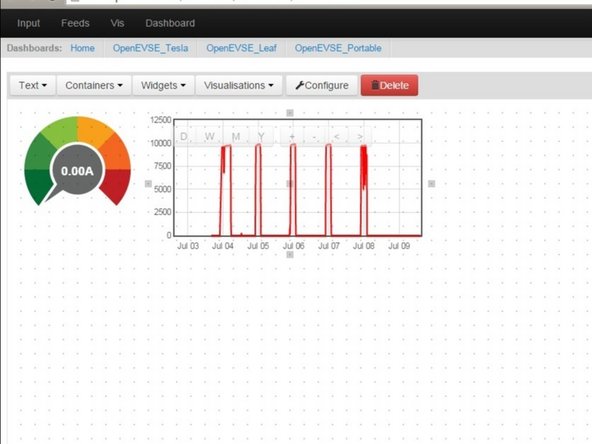
Select Widgets > Dial
-
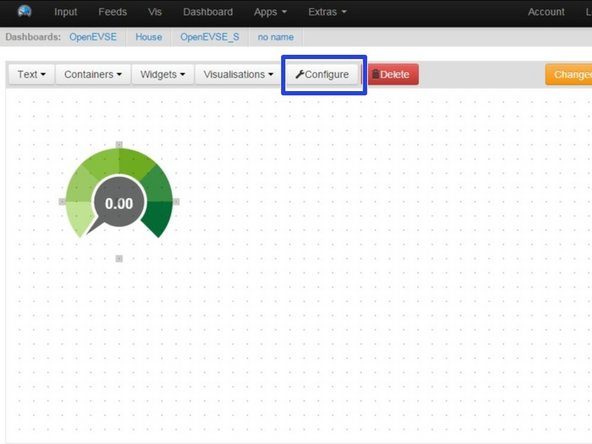
Click on grid to place the dial. Move, re-size and adjust as desired.
-
Click "Configure"
-
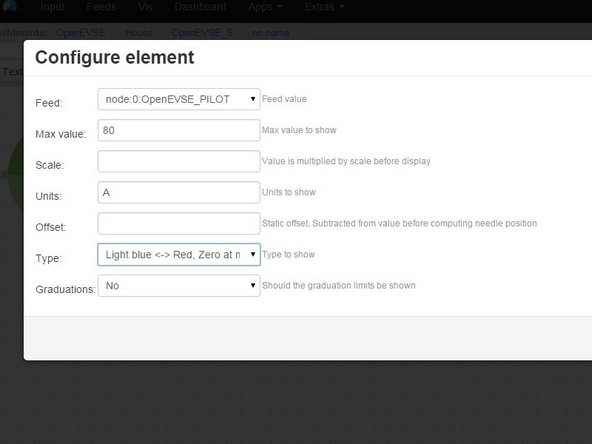
Select Feed - Set Max Value - Set Units - Pick Type
-
-
-
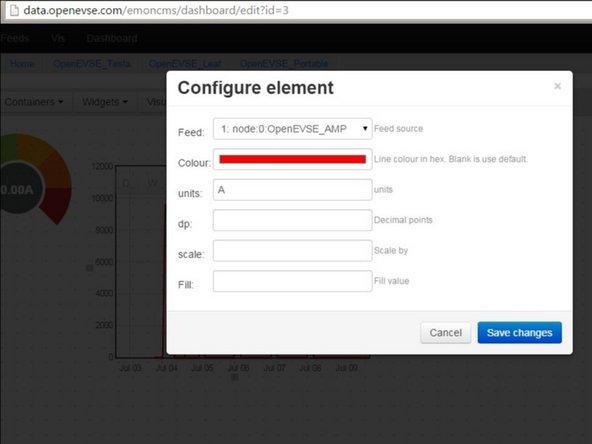
Add Rawdata charts for current and temprature. Click on Visualizations > Rawdata. Click on the grid to add click then Configure.
-
Select Feed, Color and Units
-
Move and scale as desired.
-
Save Changes
-
-
-
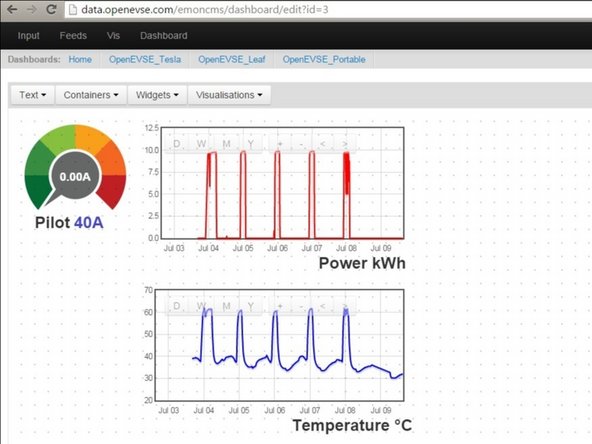
Add Text Labels
-
Feed values can be displayed. Click Widget > Feedvalue
-